Pairing, Syncing, And Claiming Your Monitor
Step 3: Pair and sync your NSI 6000 with your smart device (see Step 4 if claiming a new monitor for the first time). To pair properly, be sure to follow this exact sequence:
• Make sure your mobile device has Bluetooth turned ON and is CONNECTED to the internet (either via Cellular Data or WiFi).
• Keep your NSI 6000 within a few feet of your mobile device and make sure it has been powered on for at least 5 minutes after installing the battery.
 • Press the button on the monitor and hold until the word “Peak” stops flashing 5 seconds, and the Bluetooth Icon starts to flash, then release the button. You will see the Bluetooth Icon below. The Bluetooth radio is now activated and looking for a neighboring app request from a smart phone or tablet.
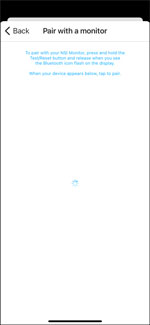
 • Open your NSI 6000 app on your mobile device and tap “Pair with a monitor”
iOS (iPhone)/iPad) DEVICES ONLY: When you pair with a monitor for the first time you will be asked to confirm that you will allow the CO Monitor App permission to access your location. This is needed for Bluetooth connectivity.
Upon successful connection, the Bluetooth Icon on your monitor will stop flashing and remain solid until the session is terminated. Pressing the button on the monitor at any time terminates connectivity.
Once the searching indicator has disappeared, tap “Find Devices”
If you see “ACTIVATION REQUIRED”, call the contractor you purchased the monitor from. They need to activate it from their Contractor App.
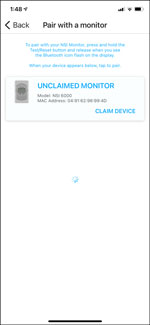
If you see UNCLAIMED MONITOR – “CLAIM DEVICE,” go to step 4 below.
 Step 4: Claiming your Monitor
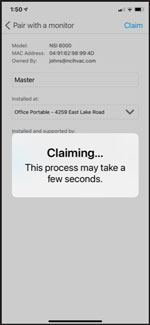
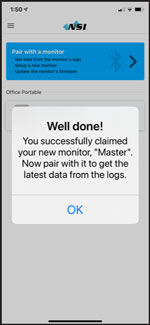
When connecting for the first time, the application will ask you if you would like to claim your monitor. By claiming it you will allow it to interface with your phone and NSI’s Cloud Service to upload and store your monitor’s information.
If the monitor has been activated and needs to be claimed, scroll on the Monitor Card and tap “CLAIM DEVICE”
Give the device a name – it might be a good idea to name the device the same as the room it will be used in.
Select or Create a New Location – Name the location as the home or building the monitor will remain installed in. This way if you have monitors in multiple locations such as a vacation home, RV, boat, or plane you can easily identify where each monitor is located.
Professional Monitoring
One of the great features of your NSI 6000 is your installing professional can continue to monitor your device’s history. You will notice when you first claim a device it shows a toggle on the screen to allow your installing professional to continue monitoring your NSI 6000.
 Provide your installing professional with access to the monitor’s data.
Make sure this toggle is on so your contractor will have access to the monitor’s history in case of a CO event.
We highly recommend you keep this feature on to allow your professional to continue monitoring your device.
Your installing professional can gather important historical information that could help them identify an issue even before it becomes a major health or life-safety problem. It’s important to sync your monitor after any event and at least once a month to keep your monitor’s history current.
If the monitor has already been claimed, simply tap on the Monitor Card to begin syncing.
Data Sync will begin automatically. The raw data stored on your NSI 6000 is transmitted via Bluetooth to your mobile device, converted, and sent to a secure cloud server, which allows you to access the cloud-stored data from any mobile device with the CO Monitor App installed and signed into your account.
Note: If for any reason the monitor stops communicating with your mobile device simply remove the battery, wait 20 seconds, and reinsert the battery. This should clear the condition and the monitor should be able to sync normally with your mobile devise. Your monitor will take about 5 minutes to go through its calibration cycle.